The manual annotator tool allows authenticated users to annotate areas (in images and videos) and/or time segments (in videos). The purpose of the manual annotator is to provide users with a tool that enables efficient and effective creation of personal models for annotations (specific to user’s needs) in images and videos through a variety of options that are provided and are the same for image and video annotations. The tool enables the user to create an annotation for the whole image or video, but also allows to annotate specific regions by defining a bounding box. Furthermore, for video annotations, the user can specify, if it is necessary, the time segment for which the annotation is observed in the video.
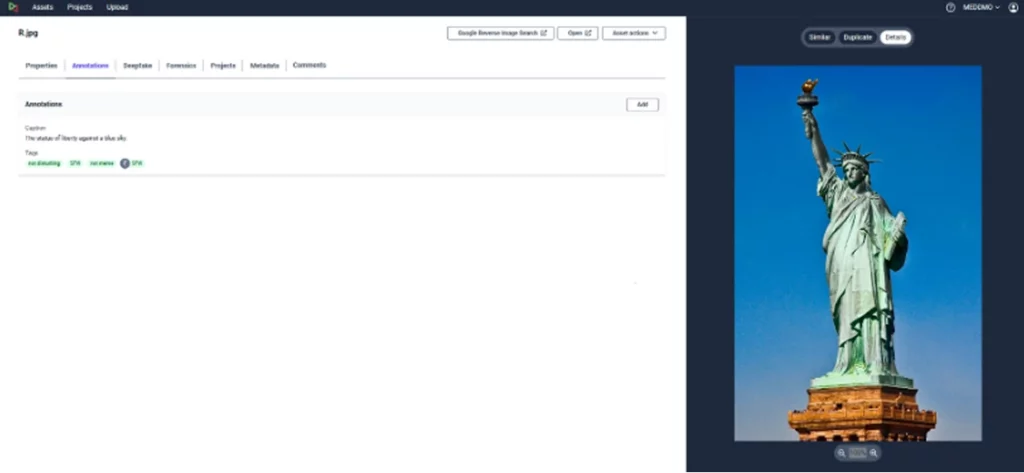
To create an image annotation the user has to select the asset and then add an annotation. Then he has to select the type of annotation among the predefined options that are provided and specify the region if necessary, as illustrated below.
Creating an image annotation
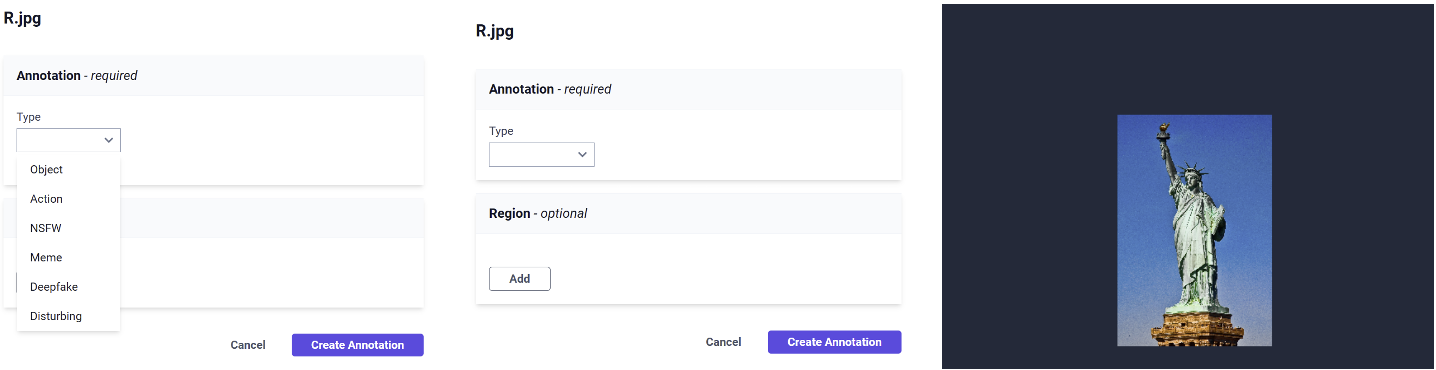
Specifying the image annotation type
The manual image annotator provides a predefined list of options for annotations that include:
- Object annotation: A predefined list of objects among which the user can select is provided but the user can also define a new object.
- Action annotation: A predefined list of actions among which the user can select is provided but the user can also define a new action that describes better what is depicted in an image.
- NSFW annotation: The user can annotate if the depicted image contains inappropriate content
- Disturbing annotation: The user can annotate if the depicted image contains disturbing content
- Meme annotation: The user can annotate the depicted image as a meme
- Deepfake annotation: The user can annotate the depicted image as a deepfake
Furthermore, users can specify regions of the image which correspond to the annotation they want to attach, defining the bounding box.

Specifying the annotation region
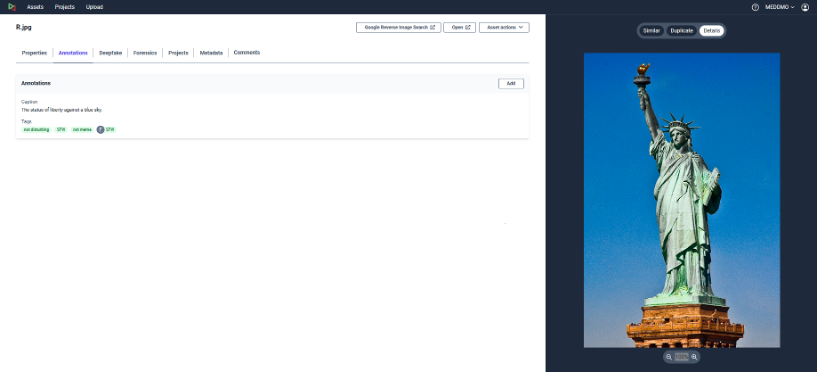
Manually created image annotations are added as tags next to the automatic annotations with the difference that the avatar of the user (creator) is also included on the left side of the tag. Clicking on the manually created annotation tag a table is provided with the annotation type, the date and time and creator. An overlay on the image also highlights the spatial region of the annotation, if any. Only the creator can modify or delete a manual annotation. The manual annotation tags are also visible on the assets home page.
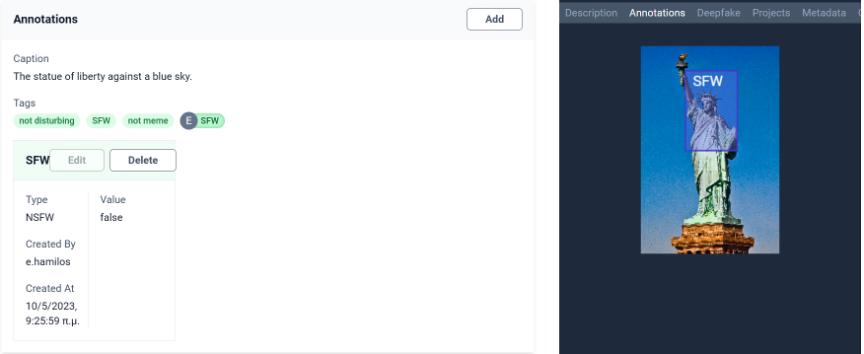
Clicking the tag and viewing the annotation info table
To create a manual annotation on a video the user has to select the asset, navigate to the annotations section and click the add button, as illustrated below.
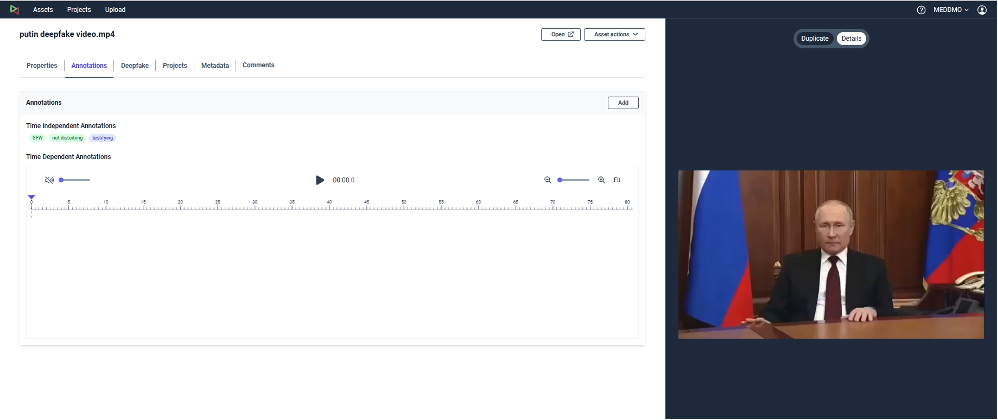
Creating a video annotation
Video annotations can be attached to a (temporal) segment of the video or to its whole duration. In the second case, the process is similar to creating an image annotation: the user has to select the type of annotation among the predefined options and specify the (spatial) region, if necessary, as illustrated below. The predefined list of options for video annotations is exactly the same with images. In this case, the user doesn’t have to ’add duration’ and specify the time segments.
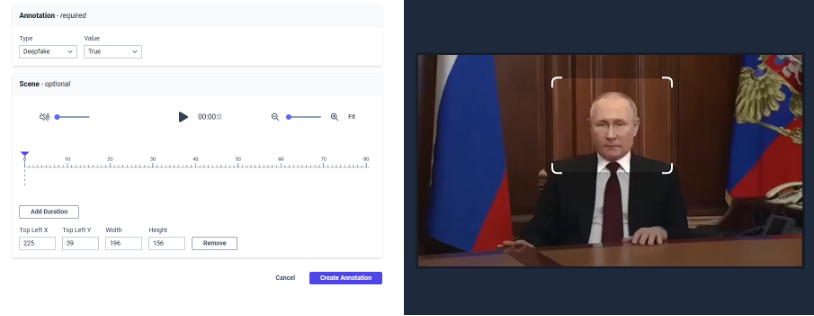
Specifying the annotation type and region
To create a time dependent annotation the user has to click on the ‘add duration’ button and then specify the time segments he wants to annotate. The user is able to specify the scene start and the scene end and, in that way, specify the duration for the annotation as illustrated below.
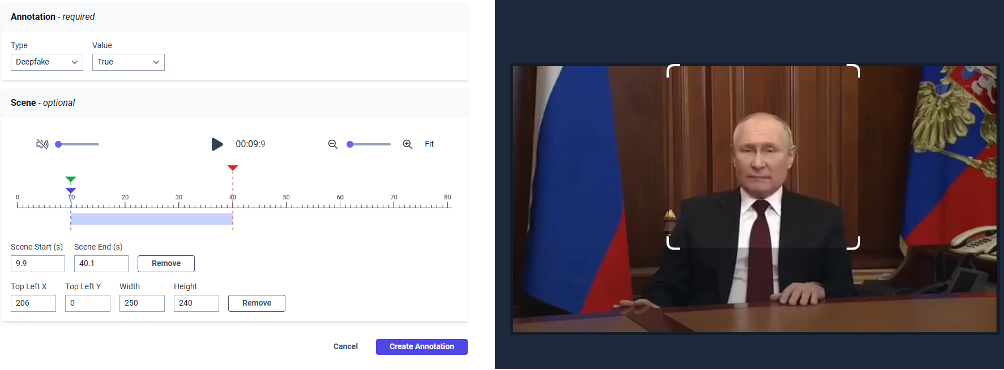
Specifying the time segments
Manually created video annotations are again added as tags next to the automatic annotations with the difference that the avatar of the user (creator) is also included on the left side of the tag. Time dependent or independent annotations are separated into two different sections. Clicking on the manually created time independent annotation tag a table is provided with the annotation type, the date and time, and the creator. An overlay on the image also highlights the spatial region of the annotation, if any. For time dependent annotations, annotated segments are shown on a timeline, and clicking on them a table is provided with the annotation type, the date and time, the creator and the ‘start – end scene’ as depicted in the following figure. In this case an overlay on the video shows the annotated regions, if any.
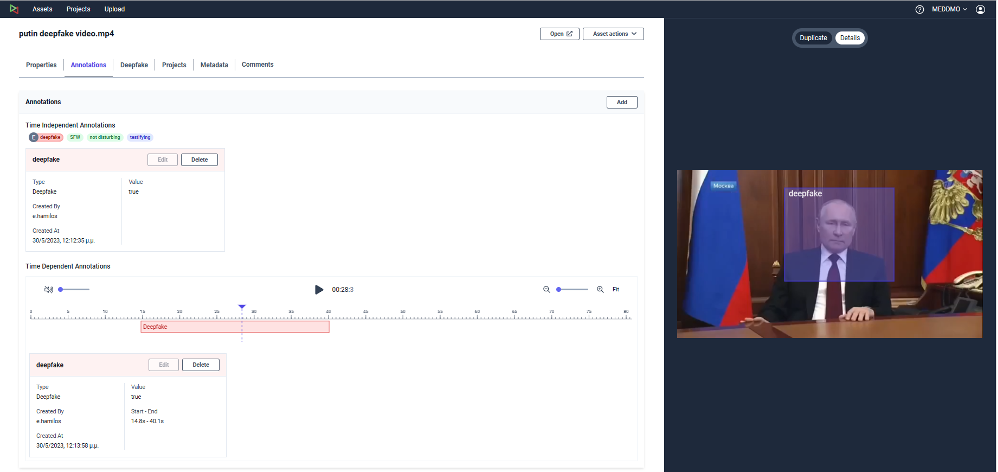
Figure 31: Clicking the tag and viewing the annotation info table